
How I create a digital original from a negative scanned by a lab

I used to develop my exposed black and white negative films myself and do my own scanning, but at this moment I have neither the time nor the physical space anymore and therefore I have to rely on external labs to do the development and scanning for me.
I have not yet found a lab that can develop and scan films exactly the way I prefer but I keep trying.
Sharpness
When you look at a gelatine (‘real’) silver print from a negative you will discover that it is not ‘sharp’ at all. When I owned an enlarger and made my own prints I created the below example.
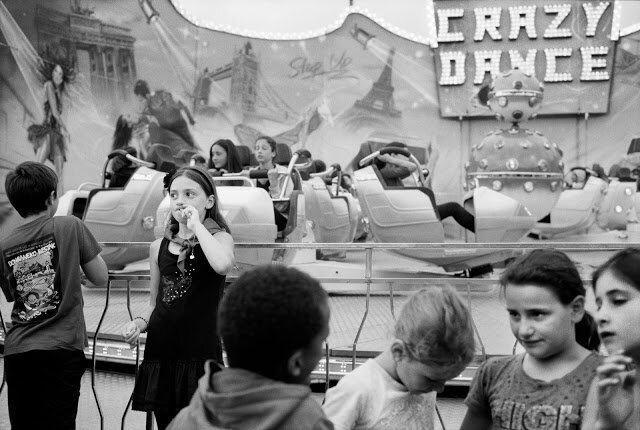
This is a copy of a gelatine silver print, created by enlarging the original negative. This the way black and white prints have been made for decades. This is NOT a digital scan from the negative.

A crop from the scanned print. Please look at the ‘unsharp’ grain structure of a real gelatine silver print. You will notice that the girl’s necklace is perfectly sharp
Please notice the grain structure, which is not ‘sharp’ at all, not in the way we define sharpness when we look at a digital photograph. Never the less this is a completely normal print from a perfectly sharp negative.
In the traditional black and white photography the impression of sharpness is created by the observers eye, looking at a print at the proper (normal) viewing distance. These negatives and prints where never intended to be viewed at a 100% magnification, like we seem to be doing on our digital devices today. If you look at a traditional silver gelatine 50cm x 60cm print at a distance of 10 centimeter nothing will be sharp. If you step back and look at the complete print at the intended viewing distance the print will be perfectly sharp.
The usual modern photolab will scan your negatives with ‘sharpness’ added digitally afterwards. Maybe because that is what you do when working on a photograph on a digital device? I don’t want my grainstructure to be ‘sharp’, and certainly not ‘digitally sharp’. That ruïnes the scan for me.
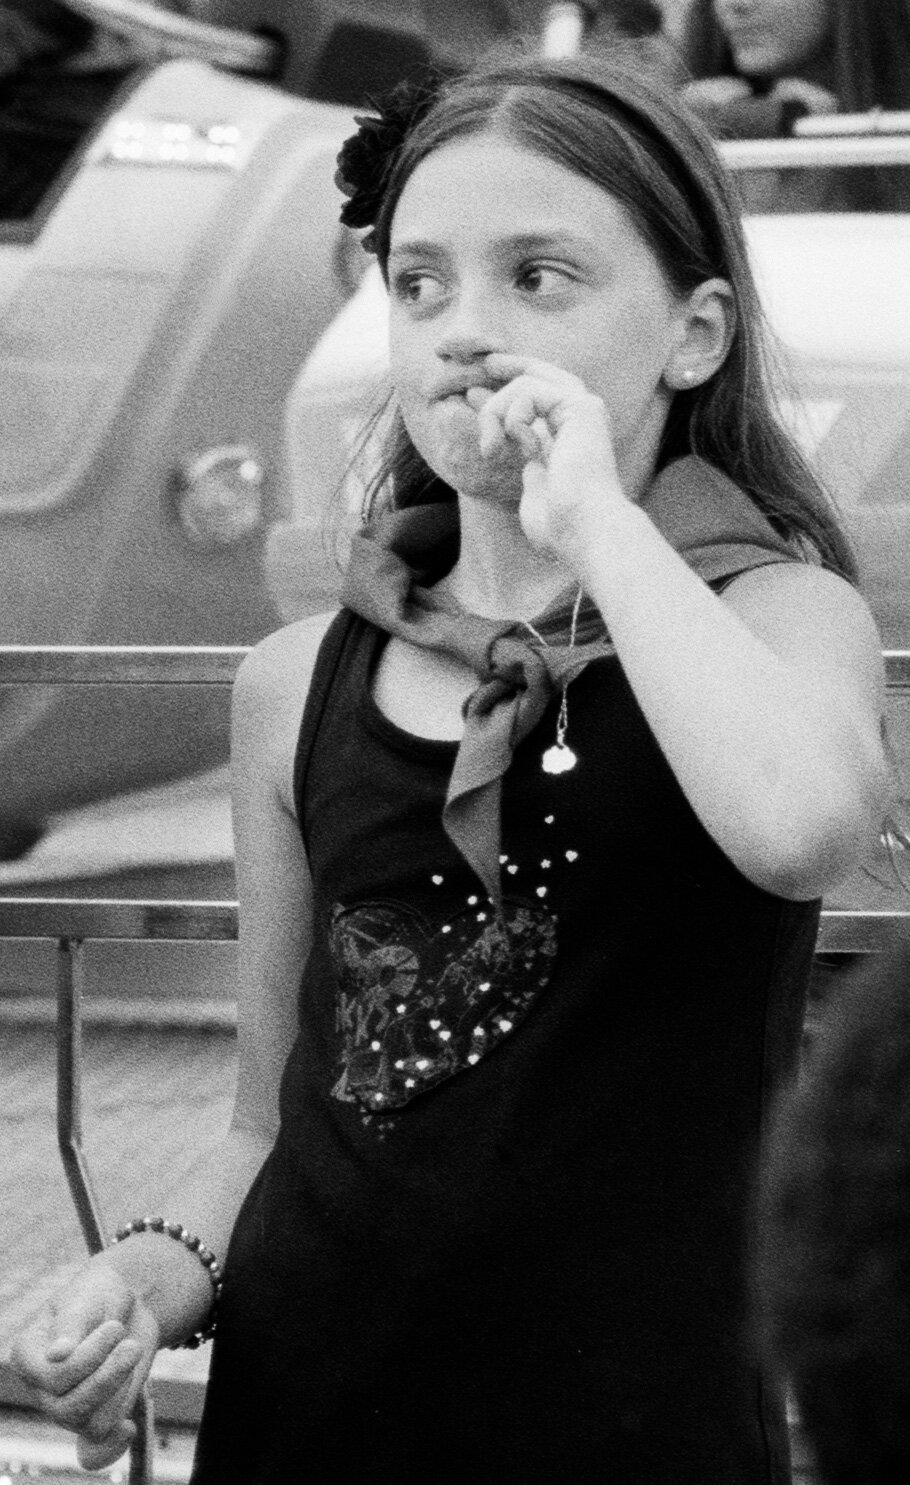
A crop from a digital scan from the same negative. Please notice the lack of sharpness in the grain structure. This is how ‘sharp’ a natural scan from a black and white negative should look like. Again, look at he the necklace which is sharp
I ask the lab that scans my negatives to use no digital sharpening whatsoever. Digital sharpening a scan from a negative increases (and sometimes kills) the grain structure but does NOT create a sharper image
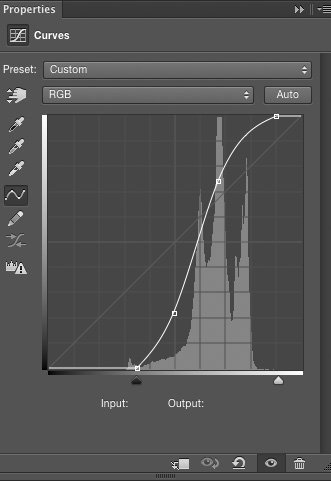
Please look at the histogram, ignore the S-curve for now. This is how a good scan should look like, with ‘headroom’ on both sides (not as much as here, this is to much, we need just a little bit of space on both ends), offering the possibility to work on the ‘digital negative’ yourself and make your own decision on the so-important tonality in the black and white regions.
Levels and tonal range
Another problem is the tone range of the scan. A gelatine silver print, when correctly made by a specialist, will have a very rich tone scale, with details in the dark parts (the almost translucent parts of the negative) and details in the light parts (the dark parts of the negative). This is what makes the difference between a digital and film black and white photo. Especially the detail in the light parts of the final picture have a ton of detail in a good film negative and final print, where a digital black and white will loose all detail in the light parts.
This tone scale defines a black and white picture, which is why I want a scan with a very ‘large’ tone scale, with a histogram looking like the above picture with a little bit of extra space at both sides.
You will also see a so-called S-curve. Film is intended to be printed on a silver gelatine paper, and that reacts to light in a very specific way. Film is calibrated to be used on these papers, and will look 'flat' if no S-Curve is applied. I want to apply my own S-curve because that is the basis for my image.
All this is why I would like a lab to scan my negatives in such a way that
No sharpening is applied
A histogram will show headroom at both sides
If possible to include some of the black borders around the image to allow me to make my own crop or leave a small black frame in place around my photograph.
I do not need a ‘finished’ scan. I am the creator of the image and I must decide on the final appearance, grey-scale and tonality.